Software Development Kit
Getting started with the SDK
When you begin integrating with Quicksilva's test environment, you will receive a .zip file containing the following items:
- Postman files for sending requests to the test environment, simulating a third-party system.
- A test Patient Administration System (PAS) for local testing.
- The conneQt® Toolbar desktop client configured to work with the test PAS.
- An API key for sending HTTP requests to the conneQt® web servers in the test environment.
- A login user ID and a unique organisation code for testing.
- Registration keys to register the Toolbar on your device.
This guide will help you get started with the SDK artifacts.
Start and Log In to the Test PAS
- In the "test-pas" folder, run "Qxlva.TestPAS.Web.exe" to start a local web application representing the Test PAS.
- Open a web browser and go to
http://localhost:5000. - On the initial home screen, select "Login" and enter the provided User ID from your SDK. Click "Login."
- Successful login will display the Test PAS home page, including your user data and an Organisation ID, which matches the Organisation ID in your Test PAS.
Import test patients into the Test PAS
If this is your first time using the Test PAS, it will have an empty database. To proceed with scenarios, you'll need test patient data.
- Click "Manage Data" in the left-navigation pane.
- Select "Load Subject Data" and choose the "test-pas-patients.json" file from the SDK. The data will be imported, and you'll see a "Data import complete" message.
- To view the test patients, click "Subject" in the left-navigation pane.
You can also create your own test patient data in a Test Patients JSON File for custom scenarios.
Running the conneQt® Toolbar
In the "desktop-client" folder, locate "Qxlva.Toolbar.Client.UserInterface.exe" and run it.
Machine Registration
If this is the first time you have run the conneQt® Toolbar client on your PC you will need to register it with Quicksilva's conneQt® platform, this is a one-time operation and authorises the conneQt® Toolbar client running on the machine with the conneQt® back-end services. Within the SDK locate the registrations.csv file and open it, the file ships with five registration keys that can be used to authorize the conneQt® Toolbar client across five different PCs, where each registration key can be used once. These keys will be valid for 30 days after you have received your SDK, please contact us if you require more. Copy the data items from one of the rows in the .csv file into the conneQt® Toolbar client registration window and submit the data, successful registration will then lead you on to the login screen.
Log in
Ensure you are logged in to the Test PAS.
Setting up Postman
The SDK includes Postman files for testing connectivity. Import these files into Postman to get started.
Import the files
- Import the following files:
- Environment: "My conneQt® Toolbar Environment" (pre-configured with your API key and the correct URL)
- Collections: "IM1_Auto_Import_Send_Message," "IM1_Register_Widget," "IM1_Send_Message"
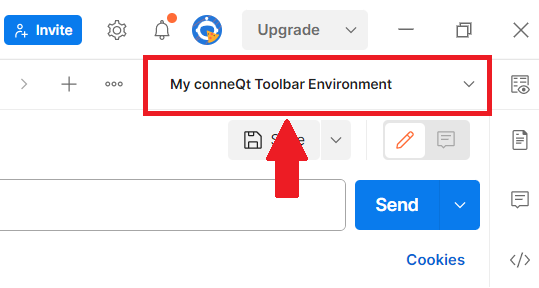
- Use the "My conneQt® Toolbar Environment" for scenarios requiring the API key and other data.

- Each collection contains a request named "test-connection." Open and send this request from Postman to check connectivity with the conneQt® platform test environment. Successful connection results in an HTTP 200 OK response.
When following our walkthroughs, make sure to select the "My conneQt® Toolbar Environment" in Postman. This environment is pre-configured with the correct API key and associated data.
Next Steps
With all parts of the SDK set up, you're ready to explore the documented scenarios on this site:
- For sending documents and coded data to organisations, refer to the Sending Patient Data
- To host your application as a widget on the conneQt® Toolbar, providing functionality to Toolbar users, see the Widgets
Feel free to reach out if you have any questions or need further assistance!